
Bicycle Tire Replacement Made Easy: Expert Tips & Guide
Keeping your bike in top condition means knowing when it’s time for a bicycle tire replacement. Worn or damaged tires can affect your safety, comfort, and overall riding performance. In this guide, we’ll cover expert tips on how to identify the right time to replace your tires, the tools you’ll need, and step-by-step instructions to make the process simple. Whether you’re a casual rider or an e-bike owner, this guide will help you ride with confidence.
Tube vs. Tubeless: What to Know Before Replacing Your Road Bike Tires

When planning a road bike tire replacement, one of the biggest decisions is whether to stick with traditional tubed tires or upgrade to a tubeless setup. Both options have unique benefits and drawbacks, and the right choice often depends on your riding style, terrain, and maintenance preferences. Understanding the differences will help you make an informed decision before buying new tires.
Tubed Tires (Traditional)
-
Easier to install and replace, even for beginners.
-
Typically more affordable than tubeless systems.
-
Easy to carry spare tubes for quick roadside repairs.
-
Higher risk of pinch flats if underinflated.
Tubeless Tires (Modern Option)
-
Run at lower pressures for improved comfort and traction.
-
Reduced risk of pinch flats, since there’s no inner tube.
-
Self-sealing sealant inside helps prevent small punctures.
-
Requires specific rims and more effort to install.
-
Can be messier to maintain due to liquid sealant.
Choosing between tubed and tubeless often comes down to convenience versus performance. Casual riders may prefer the simplicity of tubes, while performance-oriented cyclists may find tubeless tires worth the investment.
Tools Checklist: Everything You Need to Change a Road Bike Tire
Changing a road bike tire at home is much easier when you have the right tools on hand. While some tools are essential, others can make the process faster, safer, and more convenient, especially if you’re working on your bike regularly.
Essential Tools for Tire Replacement:
-
Tire levers: These are crucial for prying the tire off the rim without damaging the tube or rim tape.
-
Replacement tire and/or inner tube: Always check the size marked on your current tire to ensure a proper fit.
-
Floor pump: Ideal for fully inflating your new tire at home. A hand pump is great for rides, but a floor pump saves time and effort.
Additional Tools You Might Need:
-
Allen keys or multi-tool: Needed for removing thru-axles or bolts on certain road bikes. Many modern bikes include a small tool for this purpose.
-
Mechanic’s gloves: Protect your hands from dirt, sharp edges, or debris inside the tire while handling the tube and rim.
-
Repair stand: Not essential, but it makes wheel removal, installation, and overall tire maintenance much easier. You can also flip your bike upside down, just ensure nothing gets damaged.
Optional but Useful Accessories:
-
Valve core remover: Particularly for Presta valves, this helps tighten or remove the valve core without accidentally deflating your tube completely.
-
Rag or cleaning brush: Helps remove dirt or debris from the rim before installing the new tire, ensuring a smoother fit and preventing punctures.
Having these tools ready ensures a smoother and safer bicycle tire replacement, whether you’re fixing a flat on the road or performing a full tire swap at home.
Bicycle Tire Replacement: Tube vs. Tubeless

Replacing a bicycle tire is a basic but essential skill for any rider. Whether you’re dealing with a flat, worn tread, or upgrading your setup, the replacement process depends on whether your bike uses tube tires or tubeless tires. Below, we’ll go through the step-by-step process for both systems so you can handle either situation with confidence.
Replacing a Tube Tire (Clincher with Inner Tube)
What You’ll Need: Tire levers, new inner tube (or patched one), pump, optional patch kit
Steps:
- Remove the Wheel – Shift to the smallest cog (rear) or chainring (front), release brakes if needed, and take off the wheel.
- Deflate the Tire – If air remains, press the valve to release it completely.
- Loosen the Tire Bead – Use tire levers to pry one side of the tire off the rim. Start opposite the valve for easier access.
- Remove the Tube – Pull out the old inner tube, beginning at the valve. Check for punctures, cuts, or pinch flats.
- Inspect Tire and Rim – Feel inside the tire for sharp debris (glass, thorns, metal) and check rim tape for damage.
- Insert New Tube – Slightly inflate the new tube, place the valve through the rim hole, and tuck the tube evenly inside the tire.
- Re-seat the Tire – Push the bead back onto the rim by hand. Use levers only if necessary to avoid pinching the new tube.
- Inflate – Pump the tire to the recommended PSI, ensuring the bead seats evenly all around.
- Reinstall the Wheel – Secure it back on the bike, close quick-release or thru-axle, and re-engage the brakes.
Replacing a Tubeless Tire
What You’ll Need: Tire levers, tubeless sealant, tubeless valve, floor pump or air compressor
Steps:
- Remove the Wheel – As with tube tires, take the wheel off the bike.
- Unseat the Tire Bead – Push the bead into the center channel of the rim and use levers if needed to remove one side of the tire.
- Remove Old Sealant – If replacing, pour out any old sealant and wipe the inside of the tire and rim clean.
- Inspect Rim Tape and Valve – Check for tears or leaks in the tubeless rim tape and make sure the tubeless valve is secure.
- Install New Tire – Mount one side of the tire bead onto the rim.
- Add Sealant – Pour the recommended amount of tubeless sealant directly into the tire or inject it through the valve (if removable core).
- Seat the Bead – Push the second bead onto the rim. Use a floor pump or compressor to quickly inflate so the bead snaps into place.
- Distribute Sealant – Shake and rotate the wheel to spread sealant around the tire for a proper seal.
- Check Pressure – Inflate to the recommended PSI and ensure no leaks.
- Reinstall the Wheel – Place it back on the bike, tighten, and you’re ready to ride.
Signs It’s Time to Replace Your Road Bike Tires
Even the most durable road bike tires will eventually wear out, and replacing them at the right time is essential for safety and performance. High-performance or race tires tend to wear faster than everyday commuter tires, so it’s important to inspect your tires regularly.
Key Indicators That Your Tires Need Replacing:
-
Frequent flats or punctures: If you’re experiencing repeated flats on the same set of tires, it’s a clear sign that the rubber or inner tube protection has worn down.
-
Cracks or cuts in the tire: Look for deep cuts, slashes, or cracks in the tread or sidewall. These can compromise the tire’s integrity and increase the risk of blowouts.
-
Tread wear indicators disappearing: Many modern road tires include tread wear markers. Once these marks are no longer visible, it’s time to replace your tires.
-
Exposed casing or fibers: If you can see the fabric or casing beneath the tire surface, the tire is too worn to ride safely.
-
Loss of grip or uneven wear: Tires that feel slippery in wet conditions or show uneven wear patterns may reduce handling and braking performance, signaling replacement is needed.
Regularly checking your tires for these signs ensures your rides remain safe, smooth, and efficient. A timely bicycle tire replacement not only improves performance but also prevents potential accidents on the road.
Electric Bikes from iHoverboard
iHoverboard electric bikes combine convenience, performance, and style for riders of all levels. Designed for city commuting, off-road adventures, and foldable portability, these e-bikes feature durable frames, powerful motors, and reliable tires. Understanding each model’s specifications, including battery range, motor power, and tire size, is essential for safe riding and effective bicycle tire replacement. Whether you’re a casual rider or an off-road enthusiast, iHoverboard e-bikes deliver a smooth and efficient ride every time.
U1 / U3 Folding – Compact and Urban-Friendly
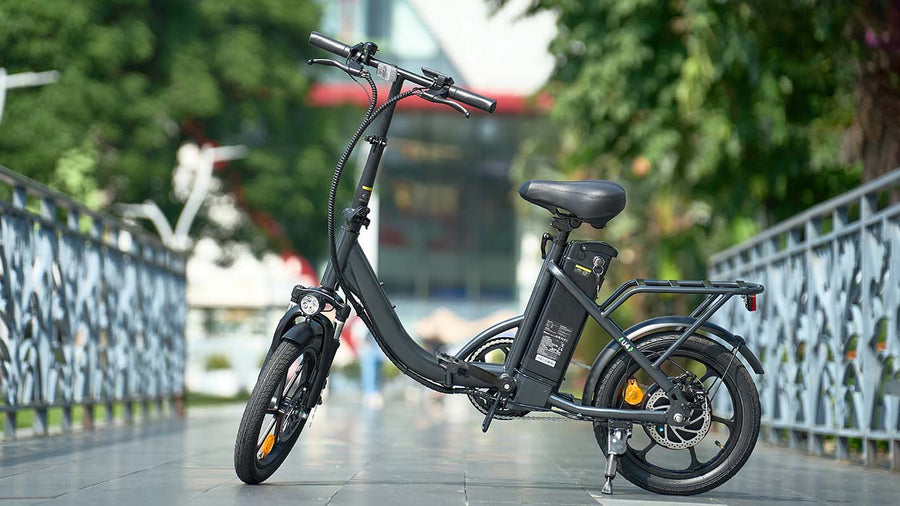
The U1 / U3 Folding e-bikes are designed for urban commuters who need a compact, easy-to-store bike without sacrificing performance. The foldable frame makes them convenient for apartments, offices, or public transport. Both models feature reliable motors and tires suitable for city streets, making tire replacement straightforward when needed. With intelligent displays and adaptive motors, riders enjoy smooth rides, while the rear or front suspension absorbs bumps for comfort.
Key Specs:
-
Motor: 500W (U1) / 350W (U3) Peak 500W
-
Battery: 36V 7.8Ah (281Wh)
-
Range: 25–40 miles (40–65 km)
-
Top Speed: 20 mph (32 km/h) / 15.5 mph (25 km/h)
-
Weight: 52 lbs (23.7 kg) / 45 lbs (20.5 kg)
-
Tires: 14×1.95" (U1) / 16×2.1" (U3) – easy to replace and maintain
-
Suspension: Rear (U1) / Front (U3)
-
Brakes: Dual Disc (Hydraulic for U1) / Dual Disc (U3)
-
Features: Foldable, intelligent display, adaptive motor
U2 Ucity Step-Thru – Comfortable City Commuter
The U2 Ucity Step-Thru is perfect for riders who want a comfortable, easy-to-mount bike for city streets. Its step-thru frame makes it accessible to riders of all heights, while the 16×2.1" tires provide stability and grip. Routine tire maintenance and replacement are simple thanks to the standard wheel setup, and the front suspension absorbs small bumps for a smoother ride.
Key Specs:
-
Motor: 500W (Rated 250W)
-
Battery: 36V 7.8Ah (281Wh)
-
Range: 22–28 miles (35–45 km)
-
Top Speed: 15.5 mph (25 km/h)
-
Weight: 45 lbs (20.5 kg)
-
Tires: 16×2.1" – durable and easy to swap
-
Suspension: Front
-
Brakes: Dual Disc
-
Features: Step-thru design, city-focused
U4 Low Step-Through – Foldable and Long-Range
The U4 Low Step-Through combines foldable convenience with long-range performance. Its slightly wider 16×2.15" tires provide improved comfort and durability on longer rides, and they’re easy to replace when worn. With 3+1 assist modes and front suspension, this bike is ideal for riders who want versatility, whether commuting or exploring new routes.
Key Specs:
-
Motor: 500W (Rated 250W)
-
Battery: 36V 10.4Ah (374Wh)
-
Range: 35–55 miles (55–90 km)
-
Top Speed: 20 mph (32 km/h)
-
Weight: 58 lbs (26.5 kg)
-
Tires: 16×2.15" – wider for smoother rides and easy replacement
-
Suspension: Front
-
Brakes: Dual Disc
-
Features: Foldable, low-step design, 3+1 assist modes
M10 / EB3 All-Terrain – MTB-Style Performance
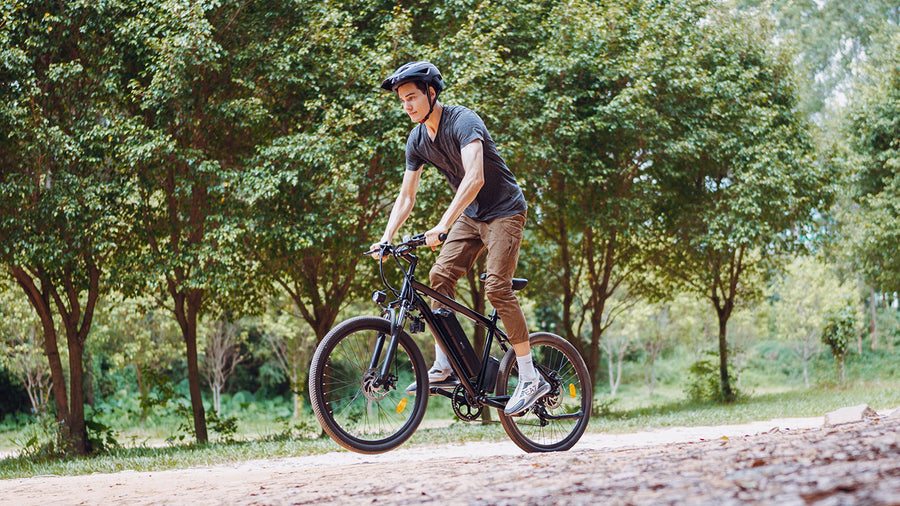
The M10 / EB3 All-Terrain e-bike is built for off-road adventures with MTB-style design and 26×1.95" tires that handle trails and uneven terrain. These durable tires are easy to maintain or replace when worn, making long-term riding safer and more reliable. With front fork suspension, Shimano 7-speed gearing, and an LCD display, riders get full control over performance on any trail.
Key Specs:
-
Motor: 500W (Rated 250W)
-
Battery: 36V 10.4Ah (378Wh)
-
Range: 44–60 miles (70–100 km)
-
Top Speed: 22 mph (35 km/h)
-
Weight: 55 lbs (24.8 kg)
-
Tires: 26×1.95" – built for off-road durability and easy replacement
-
Suspension: Front Fork
-
Brakes: Mechanical Disc
-
Features: MTB style, Shimano 7-speed, LCD display
Don’t Have an Electric Bike yet? Check out iHoverboard:
|
Spec |
||||
| Image |  |
 |
 |
 |
|
Motor |
500W |
350W (Peak 500W) |
500W (Rated 250W) |
500W (Rated 250W) |
|
Battery |
36V 7.8Ah (281Wh) |
36V 7.8Ah (281Wh) |
36V 10.4Ah (374Wh) |
36V 10.4Ah (378Wh) |
|
Range |
25–40 miles (40–65 km) |
22–28 miles (35–45 km) |
35–55 miles (55–90 km) |
44–60 miles (70–100 km) |
|
Top Speed |
20 mph (32 km/h) |
15.5 mph (25 km/h) |
20 mph (32 km/h) |
22 mph (35 km/h) |
|
Weight |
52 lbs (23.7 kg) |
45 lbs (20.5 kg) |
58 lbs (26.5 kg) |
55 lbs (24.8 kg) |
|
Load Capacity |
264 lbs (120 kg) |
265 lbs (120 kg) |
264 lbs (120 kg) |
330 lbs (150 kg) |
|
Tires |
14×1.95" |
16×2.1" |
16×2.15" |
26×1.95" |
|
Suspension |
Rear Suspension |
Front Suspension |
Front Suspension |
Front Fork Suspension |
|
Brakes |
Dual Disc (Hydraulic) |
Dual Disc |
Dual Disc |
Mechanical Disc |
|
Rider Height |
4’9”–6’1” (150–185 cm) |
5’1”–6’2” (155–188 cm) |
5’3”–6’3” (160–192 cm) |
5’3”–6’5” (160–195 cm) |
|
Notes |
Foldable, intelligent display, adaptive motor |
Step-thru, city-focused |
Foldable, low-step, 3+1 modes |
MTB style, Shimano 7-speed, LCD display |
Conclusion
Maintaining your electric or road bike starts with understanding when and how to perform a bicycle tire replacement. Regularly inspecting tire wear, choosing the right replacement tires, and using the proper tools ensures safety, comfort, and long-lasting performance. Whether you ride a compact iHoverboard folding model, a city step-thru, or an all-terrain e-bike, keeping your tires in top condition is key to a smooth and efficient ride. With the tips and guidance provided in this guide, you can confidently replace your bike tires and enjoy every journey with peace of mind.

















Still, need help? Contact Us: support@ihoverboard.com
What's the option? Check out the option now!
Leave us a message